It’s Tutorial time, folks!
The no fuss quick-cut caricature trick (say THAT 5x fast!)
which involves gene splicing Oompa Loompas with your friends and family.
Yup, that’s just as twisted as it sounds.
Our guinea pigs in this demonstration are, or were, the Canterbury Home Educators Committee members from a couple of years back.
These fine folks commissioned a cartoon caramelisation of their group photo for that year’s yearbook.
No photos will be
harmed in the
demonstration
of this technique,
No photos will be harmed in the demonstration of this technique,
Why? – I haven’t contacted the ten members for permission.
Also a warning for those with high hopes: though this involves a whole lot of manual tracing it still helps if you can paint and draw!
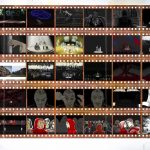
Click on the photos below and go from one to the next in the slideshow, you’ll see up close what I’m about to describe.

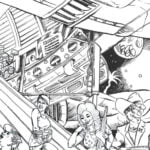
The committee in pencil, some paintwork underway
Step1… crop out the bodies and background. All that’s left is a bunch of heads.
Fade the layer to a point where you can still see them but where your pencil lines will also be strongly visible.
lock the layer or you may find yourself drawing on it and losing your hard work…
On a new layer use a black, “dull grainy chalk” in Corel Painter 2017 and use your judgement to trace the lines you deem necessary to communicate the face.
It needs to stand on its own without the photo there, so include some shading where necessary.

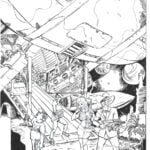
The committee in plain pencil with some background showing through
At this point I tend to fill the back ground with a light grey. This mean I can use an opaque white brush to draw in the area defined by each person’s outlines. Do this on a separate layer.. this means you can paint in a background separately without having to work around the people.

New Simple Watercolour and Variable Splatter Airbrush
Select the white backgrounds you drew for the figures and lock the transparency. This means you can use digital watercolours without spreading white ghosting over the edges when it settles: when not on special layers many paints and pencils actually have opaque white backgrounds.
This time put the original photo off to the side as reference and fill out the colours.
See below, just the colours minus the background and pencil layer, and the finished picture again: